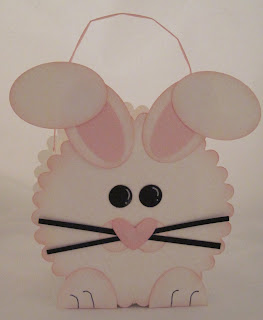
Punches used: 1 3/4" Circle, 1 3/8" Square, Word Window, 2 Step Bird Punch (for branch) Cupcake Punch (for Holly berries), Owl Punch (for eyes)
You can place your orders online through my store, or email me directly (for all items except Digital Downloads) at lpalisek@rogers.com
I think this tag would be great on a child's present, don't you?
Supplies:
Cardstock: Real Red, Whisper White, Red Glimmer Paper
Ink: Real Red
Stamp: From Santa, Loads of Love
Misc: 2 3/8" Scallop Circle Punch, 1 3/4" Circle Punch, Corner Rounder, Two Way Glue, Dazzling Diamonds, Real Red Grosgrain Ribbon, White Pom Pom
Supplies:
Cardstock: Whisper White, Night of Navy
Ink: Night of Navy
Stamp: Delightful Decorations
Misc: Northern Flurry Embossing Folder, 3/4" and 1" Circle Punches, Corner Rounder, Dimensional, White Baker's Twine, Alcohol, White Frost Paint
Supplies:
Cardstock: Very Vanilla, Chocolate Chip, Holly Berry Bouquet Designer Paper, Real Red
Ink: Chocolate Chip
Stamp: Snow Swirled
Misc: Scallop Edge Border Punch, Boho Blossoms Punch, Corner Rounder, Dazzling Details, Two Sided Tape, Scoring Tool
We had fun at the Tags, Tags, and More Tags Classes this weekend! I thought I would share a few of the tags we made so over the next little while watch for more postings.
This tag is great for those large presents and really easy to make.
Supplies:
Cardstock: Cherry Cobbler, Crumb Cake
Ink: Cherry Cobbler
Stamp: Dear Santa
Misc: Extra Large and Large Oval Punches, Square Lattice Embossing Folder, Silver Glimmer Paper, Glimmer Brads - Basics, Cherry Cobbler/White Baker's Twine
It's Good To Be The Hostess!
How's this for a really simple (but pretty!) Christmas card? This will be one of the 6 cards we will be making at the Basic & Beautiful Class on Monday, October 24th. Click here to go to my Class Page to see further details.
Do you like this gift card? My good friend Linda Willman shared it with me and I will be sharing it with everyone at my Tags, Tags, And More Tags! Class. It will be one of 10 gift cards/tags that we'll be making at this class. Click here for all the information on my Class Page.
This card is made using my favorite new Christmas set called Christmas Lodge. The set is on page 29 of the Holiday Mini Catalogue. The cardstock is whisper white and wisteria wonder. I used an oval mask, stamped the image in black in the center of the masked oval and sponged bashful blue and wisteria wonder ink around the edges. The image is colored with watercolor pencils with highlights added with a white Signo Gel Pen. The last step was to add some glitter using the 2 Way Glue Pen and Dazzling Diamonds Glitter.
Isn't this a fun card? My friend and fellow demo Tracie St. Louis gave me the instructions for this card and I made it for another of my friends and fellow demo Linda Willman, who celebrated her birthday this weekend. Happy Birthday Linda! I used the new Just Add Cake DP and the greeting comes from the Bring On the Cake set.
Today's card is made with the new Ronald McDonald set called Turtle & Company. For each set sold, Stampin'Up! donates $3 to the Ronald McDonald House Charities. Check out this set on Page 16 of the Idea Book & Catalogue, there are some really cute images in it! I also used the new Stripes Embossing Folder and colored my jewels with a Sharpie marker. The turtle is colored with markers on Watercolor paper and his shell is popped up and covered with Crystal Effects.
I just wanted to let everyone know that I haven't disappeared. I just took a bit of a vacation after my Open House, but am back in the thick of it now!
I have decided to have a theme for my August Basic & Beautiful! Class on August 29th, and it is going to be Christmas! It is never too early to start thinking about, and preparing for, this wonderful holiday season. Click here to hop over to my class page for all the details.
If you like these two cards, then you will enjoy the Basic & Beautiful! Class on July 25th, as these are only 2 of the 6 cards we will be making! Click here to hop on over to my class page and see all the details!
New Hostess Set
Check out this pretty card I received in a swap last night at a demonstrator meeting. Unfortunately my picture does not do justice to the colors! This is a new Hostess Set called Array of Sunshine coming July 1st, and it uses the new InColors Calypso Coral, Pool Party, and Lucky Limeade. Unfortunately, there is no name on the card so I can't give anyone their proper credit!
Bella Toile Background
One of my favorite background stamps is retiring as of June 30th. I have used the Bella Toile stamp a lot since it came out and will really miss it. It is a fabulous stamp to use for so many different techniques.
This card is one that we will be doing on Monday, June 27th at the Basic & Beautiful! Class and it uses the Faux Tile Technique. I did not put a greeting on the card as I decided to wait to see when I needed it. To see the details on the Basic & Beautiful! class, click here.
Before I move on to today's cards, I would like to take a minute to thank everyone who sent me cards and well wishes. Surgery is now behind me and am definitely on the road to recovery!
Now on to stamping stuff! I have been going through some of my retired sets and cards, and thought I would like to share some cards made with sets that are retiring. One of the sets I will definitely miss is called Pun Fun and can be found on page 76 of the big catalogue. Above are some cards made with this set over the years.
Another Sneak Peek!
I got the idea for this card from my friend and fellow demonstrator Linda Willman. This stamp set is called Snow Much Fun and is one of the new sets that demonstrators can buy in advance of the new catalogue release. It has other really cute images as well, including a chubby snowman! I colored it with some of the new In Color markers; Island Indigo, Pool Party, Calypso Coral, & Lucky Limeade.
Sneak Peek
In an earlier post, I mentioned that I really like the new In Colors coming July 1st. I wanted to make a quick card so that I could give you a peak at them. This card uses the new stamp set called Pennant Parade, all of the new In Colors, as well as a retired alphabet set. And guess what? There is actually a Pennant Punch as well! Yay!!
7:00 - 8:30 p.m.
The new catalogue is coming July 1st and it is filled with awesome products! I am especially pleased with the New In Colors.
Drop in on July 14th, see some new products, do some Make & Takes, shop my retired products, have a snack, maybe win a door prize, and have FUN!
You can attend for free, but must reserve a ticket to hold a spot!
I haven't had much time to stamp in the last couple of days so I thought I would share a card I made soon after our T.O.T.S. day. This card uses an acetate technique that we learned that day and the stamp is called "Sail Away".
If you would like to learn this technique, sign up for one of my Stamping Technique Clubs starting in September and tell me you want to learn this. If you were at the T.O.T.S. day, give it a try. It is exactly the same technique as what we did on the leaf, but I used a couple of shades of blue ink to paint the back. The sailboat is stamped in black and embossed with clear embossing powder.
Would you like to make this card? Then join me for the
Last Chance Class to be held on June 9th at 7:00 p.m.(new date).
Each year, Stampin'Up! retires some of their stamp sets and accessories to make room for new and exciting products. The retiring stamp sets will be available until June 30th but all other items are only available while supplies last. Some of these products can sell out very quickly, so don't delay in placing your orders.
Last Chance Stamps
Click Here to view the list
Last Chance Accessories
Click Here to view the list
Last Chance Definitely Decorative
Click Here to view the list
I have been seeing these quilt cards all over the internet so thought it was time to make my own. They are not difficult to make, just punch the squares with the Scallop Square Punch and attach to cardstock (I use the MultiPurpose Adhesive Sheets for this), and run it through the Big Shot using the Square Lattice Embossing Folder. I kept the stamping simple on the card as I wanted the quilt effect to really pop.
Stamp Sets: Animal Stories, Family Phrases
Ink: Tempting Turquoise
Cardstock: So Saffron, Tempting Turquoise, Sale-A-Bration DP from 2010
Misc: MultiPurpose Ahesive Sheets, Scallop Square Punch, Daffodil Delight 1/8"
Taffeta Ribbon, Glue Dot, Gem, Square Lattice Embossing Folder, Big Shot
Stamp the card front with En Francaise in Sahara Sand and sponge Sahara Sand around edges of card. Punch a 2 1/2" circle from Early Espresso and attach to card. Punch 3 small circles with a handheld punch from Early Espresso cardstock and attach to card as Faux Brads. Cover "brads" with Crystal Effects and let dry.
Once the butterfly is completely dry, add gems to the center and attach to large circle on card with Tombow adhesive, just in a line down the middle of the butterfly so that the wings can still be bent up.
Stamp Sets: En Francaise, Friends 24-7
Ink: Sahara Sand, Riding Hood Red, Bravo Burgundy, Early Espresso
Cardstock: Sahara Sand, Early Espresso, Naturals Ivory
Misc: 2 1/2" Circle Punch, Handheld Punch, Clear Chunky Glitter, Crystal Effects, Stamping Sponge, Gems, Beautiful Butterflies Die, Big Shot, Markers in Old Olive and Riding Hood Red
Sail Away
To make the sun, punch a circle out of white cardstock that is the same size as your card layer using the 2 1/2" circle punch and attach to your white card layer with Dotto adhesive. Sponge the colors in the circle as follows: the bottom of the circle is Daffodil Delight, Pumpkin Pie in the middle and Tangerine Tango for the top section of the circle. Remove mask. Color the stamp with Basic Black and Turquoise markers and stamp. Stamp again on a piece of white cardstock, cutout the sails and attach to card. Stamp greeting and assemble card.
Stamp Sets: Sail Away, Bring on the Cake (Occasions Mini)
Cardstock: Whisper White, Tempting Turquoise
Ink: Daffodil Delight, Pumpkin Pie, Tangerine Tango, Basic Black
Misc: 2 1/2" circle punch, stamping sponges
Today's card is another quick, easy card using my new favorite stamp set "Fabulous Florets" which can be found on Page 22 of the Summer Mini Catalogue. It is also the stamp set that I am featuring in my Stamp of the Month class being held on June 16th. For more details on the class, click here. The flowers are stamped in Basic Black Craft ink, embossed with Clear Embossing Powder and ink is added to the center of each flower with a sponge or sponge dauber, with a gem added to the center for a bit of glitz!. See supplies list below:
Stamp Set: Fabulous Florets
Ink: Black Craft, Daffodil Delight, Melon Mambo, Concord Grape
Cardstock: Melon Mambo, Basic Black, Whisper White
Misc: Clear Embossing Powder, Sponge Dauber, Gems
Basic & Beautiful
7:00 - 8:30
Cost: $20 or FREE with a $30 order
I will be offering a Basic & Beautiful Class on the last Monday of every month starting in May. These classes will be a fabulous opportunity to increase your stash of cards while enjoying an evening stamping with friends! At these classes we will be making 6 seasonal cards and, as the name implies, the cards will be fairly simple to make but still wonderful to give! The card pictured above is one of the cards we will be doing in May and, even though it is a quick card, it uses one of my favorite techniques and is gorgeous!
Email me directly at lpalisek@rogers.com to register
Are you like me? Do you find you go in cycles with your stamp sets? I can't remember the last time I used the Pick A Petal set and yet it is one of my all time favorites. I decided to pull it out today and make this quick card. I stamped it in black on white cardstock, colored the flower with Daffodil Delight and Tangerine Tango markers and then ran it through the BigShot with the Square Lattice Folder. The greeting is from Just Believe, punched out with the Word Window punch and then attached to the Modern Label punched in Tangerine Tango and another in Daffodil Delight. A very simple, quick card to make but I really like it.
Cards for Any Occasion Class
This is another of the cards we will be making at this class. Not only will we be making some fabulous cards, we will also be learning a new way to stamp! There is still time to sign up. For all the details, and to see 2 other cards we will be making, click here.
STRENGTH & HOPE CAMPAIGN
Campaign Dates: May 1-August 31, 2011
Stampin' Up! is proud to partner with The Breast Cancer Research Foundation in the Strength & Hope Campaign.
Throughout the 2011 Summer Mini Catalogue sales period, Stampin' Up! will donate $2* from the sale of each Strength & Hope set to The Breast Cancer Research FoundationSummer Mini Catalogue Starts Today!
The Summer Mini Catalogue starts today and runs until August 31st. It is just full of fun new stamp sets, as well as some really great new products. Click here to view the catalogue.
You won’t want to miss this class! We are going to be making everything except the standard card! We will have cards that fold, swing, and open all different ways! The picture shows 3 of the 4 cards, watch my blog in the next few days to see the last card!
Friday, March 4th at 7:00 p.m.
Cost: $20 or FREE with a Sale-A-Bration order-$60Here is my Valentine card for you. My clubs have been learning to make their own embossing folders and here is one that I made using our Owl Punch. I ran it through the BigShot with Crumb Cake cardstock, and then, to make the owls stand out a bit more for the background, I sponged some crumb cake ink around the edges of them with a sponge dauber. Of course, there had to be a bit of shimmer, so his vest is punched from the Red Glimmer Paper in the Occasions Mini catalogue.
Stamp: Fabulous Phrases
Ink: Going Gray
Cardstock: White, Black, Old Olive, Jolly Holiday
DP
Punches: Owl, Bird, Scallop Oval, Large Oval, Word Window
How do you like my cute little Valentines card? The card is made using the Scallops #2 Die with the BigShot and the white circle is punched with the 2 1/2" circle punch. The box for the hearts is from the new set in the Occasions Mini called Create a Cupcake and the hearts and greeting are from Loads of Love. The 2 extra red hearts are punched with the Heart to Heart punch and, of course, the hearts I didn't color I covered with glitter. The last touch is just a bit of the trim from the Holiday Mini tied around the top fold of the card.
For those young stampers out there, my first class on the schedule is:
We will be making some Valentine Cards and treat holders. The picture shows just a couple of the cards.
$15 for one young stamper, or $25 for two or Mom
Saturday, Jan. 29/11
2:00 p.m.